Oracle provides an OVA (Open Virtual Appliance) file to install the 23c Free Developer Release on Virtualbox. An OVA file contains metadata and file elements in the Open Virtual Format (OVF) to package and distribute one or more virtual machines. The OVA-file provided by Oracle can also be used to import the Oracle 23c Free VM to Proxmox. Here are steps on how to do that:
First download the OVA-file from here:

The next step is to create a VM in Proxmox without disks and without CD (ISO) attached to it:
First provide a name:

Then provide the OS-details and select to not use any CD/DVD media.

At the System settings you may leave everything on default:

Delete the disk, which is pre-selected by clicking on the waste-baskett at the left side:

So that it looks as follows:

Provide the number of CPUs you want to use on your VM. In my case I do use 2 cores. I usually set the Type to „host“ to provide all features my host-CPU provides to the VM:

Set the amount of RAM you want to provide to your VM:

In the last step define your network settings. I left everything on default on my setup:

Finally check the confirmation page and make sure to NOT select the „Start after created“ box. Then click on Finish:

After a couple of seconds the VM is visible on your Proxmox GUI:

To import the OVA-file downloaded, follow the steps below:
scp the OVA-file to the hypervisor in e.g. the /tmp-directory (my Proxmox hypervisor has IP 192.168.2.2):
$ scp Oracle_Database_23c_Free_Developer_Appliance.ova root@192.168.2.2:/tmpLogin to the hypervisor and untar the OVA-file:
root@pve-sandbox:~# cd /tmp
root@pve-sandbox:/tmp# ls -ltr *.ova
-rw-r--r-- 1 root root 6996211200 Jun  2 20:50 Oracle_Database_23c_Free_Developer_Appliance.ova
root@pve-sandbox:/tmp# tar xvf Oracle_Database_23c_Free_Developer_Appliance.ova
Oracle DB Developer VM.ovf
Oracle DB Developer VM-disk001.vmdk
Oracle DB Developer VM-disk002.vmdk
root@pve-sandbox:/tmp#
List the VMs you have. In my case I only have the one with VM ID 100 I just created:
root@pve-sandbox:/tmp# qm list
      VMID NAME                 STATUS     MEM(MB)    BOOTDISK(GB) PID
       100 Ora23cFREE           stopped    8192               0.00 0
root@pve-sandbox:/tmp#
Check the storage on my system:
root@pve-sandbox:/tmp# pvesm status
Name             Type     Status           Total            Used       Available        %
local             dir     active        98497780        17173872        76274360   17.44%
local-lvm     lvmthin     active       366276608               0       366276608    0.00%
root@pve-sandbox:/tmp#
I.e. I have storage local-lvm, which I can use to import the disks to.
Import the 2 disks to my VM with VM ID 100, storage local-lvm. Due to blanks in the file-name, please consider the single quotes around the vmdk-file:
root@pve-sandbox:/tmp# qm importdisk 100 'Oracle DB Developer VM-disk001.vmdk' local-lvm -format qcow2
importing disk 'Oracle DB Developer VM-disk001.vmdk' to VM 100 ...
  Logical volume "vm-100-disk-0" created.
transferred 0.0 B of 29.3 GiB (0.00%)
transferred 300.0 MiB of 29.3 GiB (1.00%)
transferred 600.0 MiB of 29.3 GiB (2.00%)
transferred 900.0 MiB of 29.3 GiB (3.00%)
transferred 1.2 GiB of 29.3 GiB (4.00%)
...
transferred 29.0 GiB of 29.3 GiB (99.07%)
transferred 29.3 GiB of 29.3 GiB (100.00%)
transferred 29.3 GiB of 29.3 GiB (100.00%)
Successfully imported disk as 'unused0:local-lvm:vm-100-disk-0'
root@pve-sandbox:/tmp#

root@pve-sandbox:/tmp# qm importdisk 100 'Oracle DB Developer VM-disk002.vmdk' local-lvm -format qcow2
importing disk 'Oracle DB Developer VM-disk002.vmdk' to VM 100 ...
  Logical volume "vm-100-disk-1" created.
transferred 0.0 B of 29.3 GiB (0.00%)
transferred 300.0 MiB of 29.3 GiB (1.00%)
transferred 600.0 MiB of 29.3 GiB (2.00%)
transferred 900.0 MiB of 29.3 GiB (3.00%)
transferred 1.2 GiB of 29.3 GiB (4.00%)
...
transferred 29.0 GiB of 29.3 GiB (99.04%)
transferred 29.3 GiB of 29.3 GiB (100.00%)
transferred 29.3 GiB of 29.3 GiB (100.00%)
Successfully imported disk as 'unused1:local-lvm:vm-100-disk-1'
root@pve-sandbox:/tmp#
root@pve-sandbox:/tmp# pvesm list local-lvm
Volid                   Format  Type             Size VMID
local-lvm:vm-100-disk-0 raw     images    31457280000 100
local-lvm:vm-100-disk-1 raw     images    31457280000 100
root@pve-sandbox:/tmp#
Add the disks as scsci-disks to the VM in the Proxmox GUI by going the the VM hardware and double click on the „Unused disk 0“:

Click on Add:

Do the same for Unused disk 1:


Afterwards the disks are listed as normal scsci-harddisks:

The last step is to adjust the boot order. Go to the VM options, double click on „boot order“ and drag and drop the first disk to the top and enable it:

Before:

After:

The VM options then look as follows:

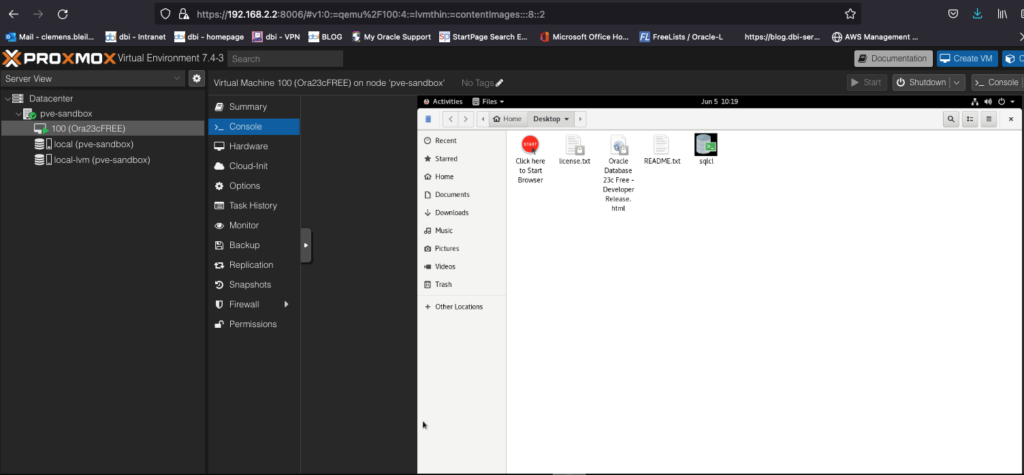
Then start the VM the first time. After booting the console shows:

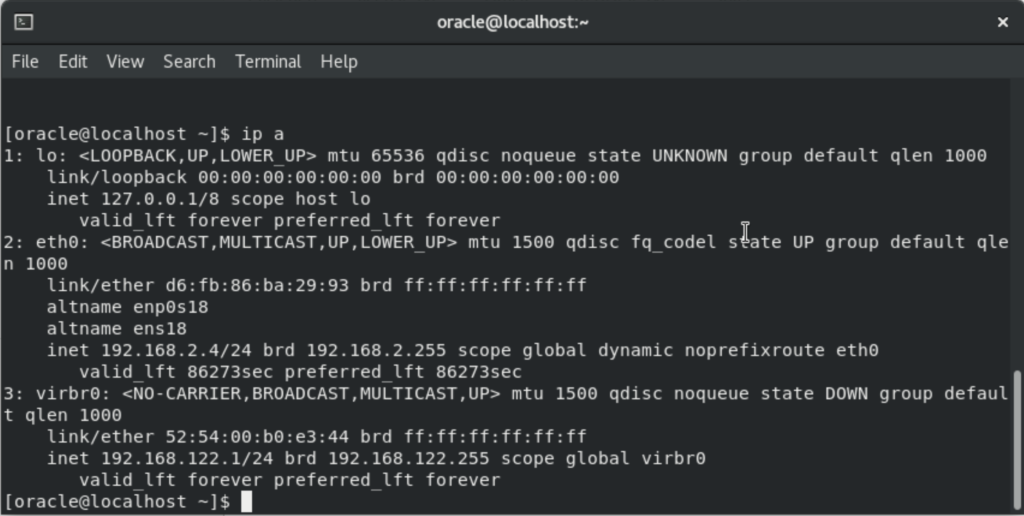
I opened a terminal in the console and had an IP address assigned automatically:

So I could login as oracle (password oracle) via ssh:
dbi-lt-cbl2:AWS cbl$ ssh oracle@192.168.122.1
Are you sure you want to continue connecting (yes/no/[fingerprint])? yes
Warning: Permanently added '192.168.122.1' (ED25519) to the list of known hosts.
oracle@192.168.122.1's password:
Activate the web console with: systemctl enable --now cockpit.socket

Last login: Mon Jun  5 10:18:36 2023
[oracle@localhost ~]$
And connect to my DB after unsetting the TWO_TASK:
[oracle@localhost ~]$ ps -ef | grep pmon | grep -v grep
oracle      1900       1  0 10:18 ?        00:00:00 db_pmon_FREE
[oracle@localhost ~]$ echo $ORACLE_SID

[oracle@localhost ~]$ . oraenv
ORACLE_SID = [oracle] ? FREE
The Oracle base has been set to /opt/oracle
[oracle@localhost ~]$ sqlplus / as sysdba

SQL*Plus: Release 23.0.0.0.0 - Developer-Release on Mon Jun 5 10:26:24 2023
Version 23.2.0.0.0

Copyright (c) 1982, 2023, Oracle.  All rights reserved.

ERROR:
ORA-01017: invalid credential or not authorized; logon denied


Enter user-name: ^C
[oracle@localhost ~]$ echo $TWO_TASK
FREEPDB1
[oracle@localhost ~]$ unset TWO_TASK
[oracle@localhost ~]$ sqlplus / as sysdba

SQL*Plus: Release 23.0.0.0.0 - Developer-Release on Mon Jun 5 10:26:43 2023
Version 23.2.0.0.0

Copyright (c) 1982, 2023, Oracle.  All rights reserved.


Connected to:
Oracle Database 23c Free, Release 23.0.0.0.0 - Developer-Release
Version 23.2.0.0.0

SQL> show pdbs

    CON_ID CON_NAME			  OPEN MODE  RESTRICTED
---------- ------------------------------ ---------- ----------
	 2 PDB$SEED			  READ ONLY  NO
	 3 FREEPDB1			  READ WRITE NO
SQL>
Summary: Setting up an Oracle 23c Free Developer DB on Proxmox is fast and easy in a couple of steps.